How to Use a Protein Dispenser: Assembly, Dosing, and Cleaning, Step by Step (DP-M2)
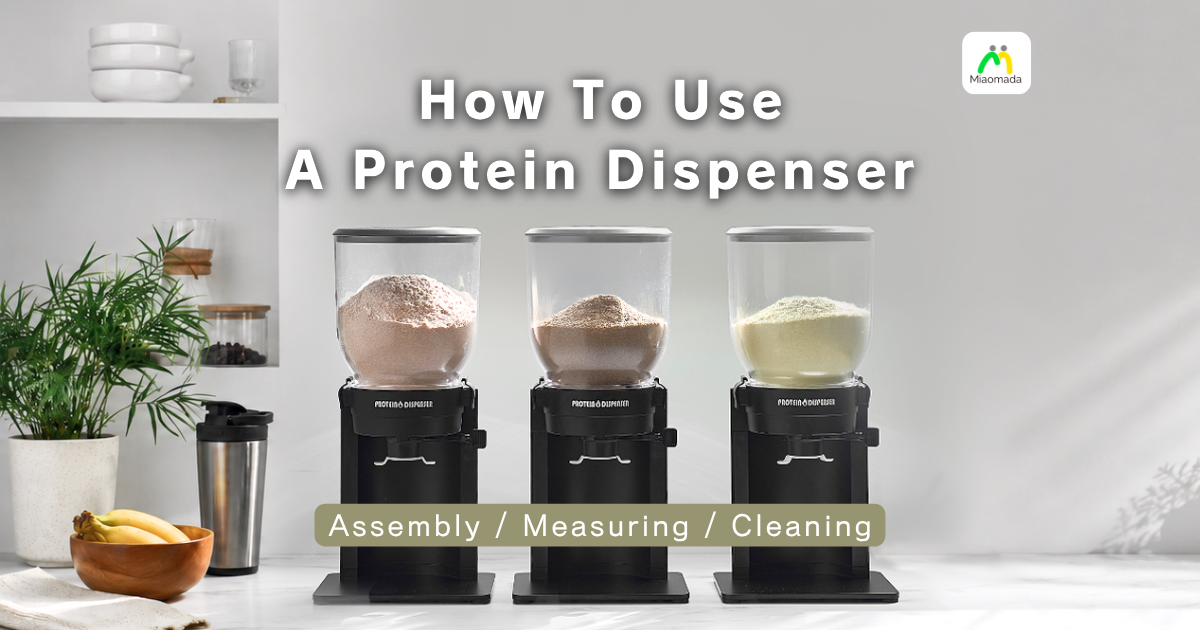
Your protein dispenser has arrived. First things first: wash every part that touches powder and set it to your shaker’s height. Once everything is dry and assembled, just fill it with your favorite protein powder and it’s ready for daily use. It’s simple: pull the lever, cap the nozzle, repeat.
Below is the full run-through, from assembly to dosing to cleaning, with the details that trip people up the first time.
Before You Start: First Wash and Assembly
1. Set the Stand to Your Shaker’s Height
The dispenser comes with a Stand Attachment and two nozzles (short and long) to fit the shaker you already own.
For a tall shaker, push the Stand Attachment down until the tabs click and make sure it’s locked. For a short one, leave it off. Combined with the two nozzles, the setup covers shaker heights from 17 to 22 cm (about 6.7 to 8.7 in).
2. Wash Everything That Touches Powder, Then Dry It Completely
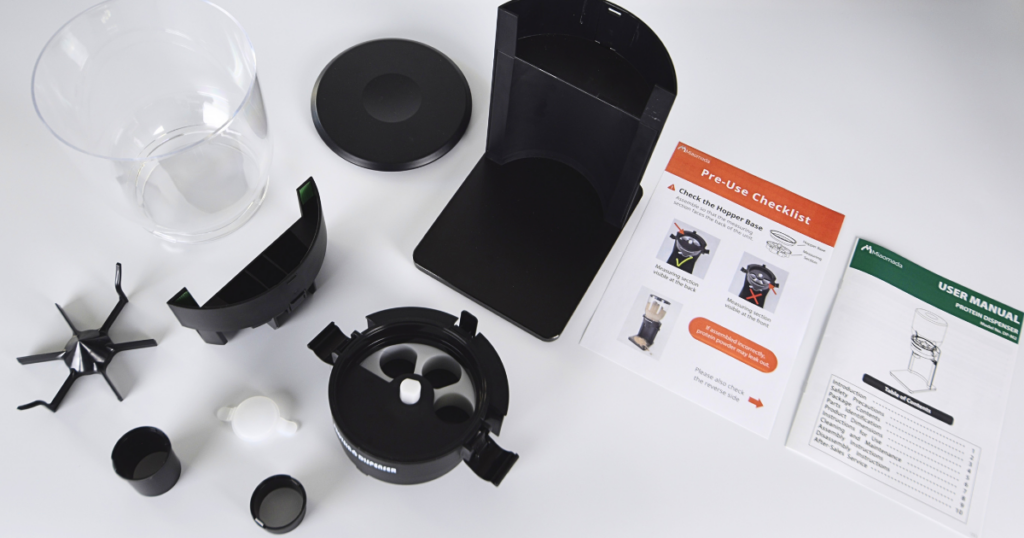
Before you assemble anything, wash every part that touches powder: lid, hopper, agitator, hopper base, main body, measuring section, connecting shaft, lever, nozzle, cap, and rotation lock. Use mild dish soap, diluted, and rinse well with cool or lukewarm water. Then dry everything completely before you move on. Leftover moisture on the parts is a hygiene problem.
3. Assemble the Hopper and the Measuring Unit
With the stand set, mount the hopper and close the clamps on both sides. Once that’s secure, set the agitator onto its mount, turn it until it lines up, and lock it in place.
Make sure the blade is seated all the way down with no gap underneath; if it isn’t, no powder will come out.
Now attach the nozzle to the measuring unit. Hook the far tab first, then push the near tab in until it holds. Fit the measuring unit onto the stand, add the lid and the nozzle cap, and you’re ready to go.
One thing to keep in mind: the closer the nozzle tip sits to the mouth of the shaker, the less powder scatters. Use the nozzles and the attachment to close that distance as far as your shaker allows.
4. Check Which Way the Hopper Base Faces
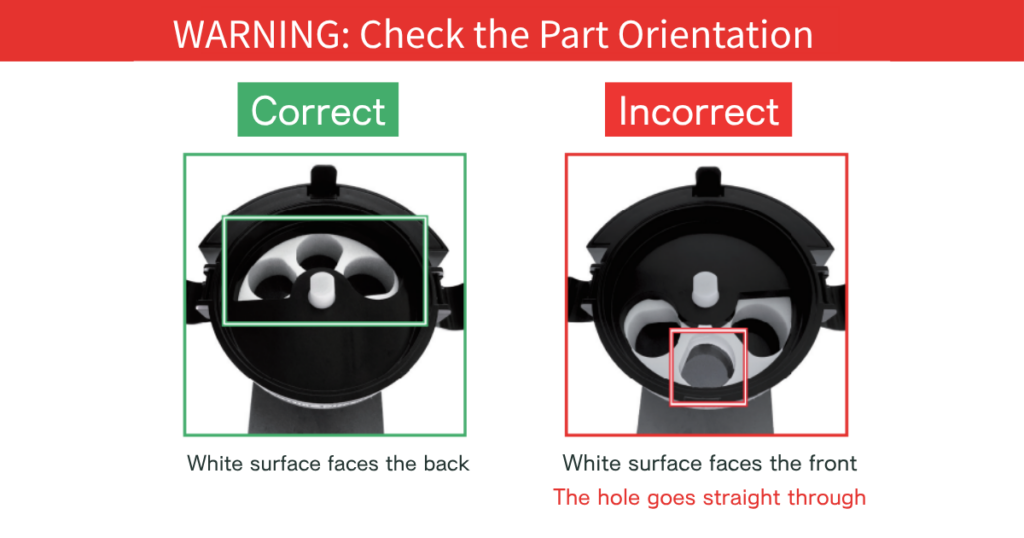
Before you add any protein, double-check the hopper base direction. If it goes in backwards, powder will run out of the nozzle non-stop; there’s no way to catch it once it starts.
It’s easy to tell which way it’s facing. Assembled correctly, the white face sits at the back. If the white face is at the front and you can see straight through the hole, it’s in backwards. There’s a recess to help you line it up, but the reliable check is the white face at the back with no hole visible.
Fill and Daily Use
When you’re ready to start, take the lid off and pour protein in from a freshly opened bag or tub, up to 1 kg. Put nothing but protein in the hopper, then close the lid and make sure it’s shut properly.
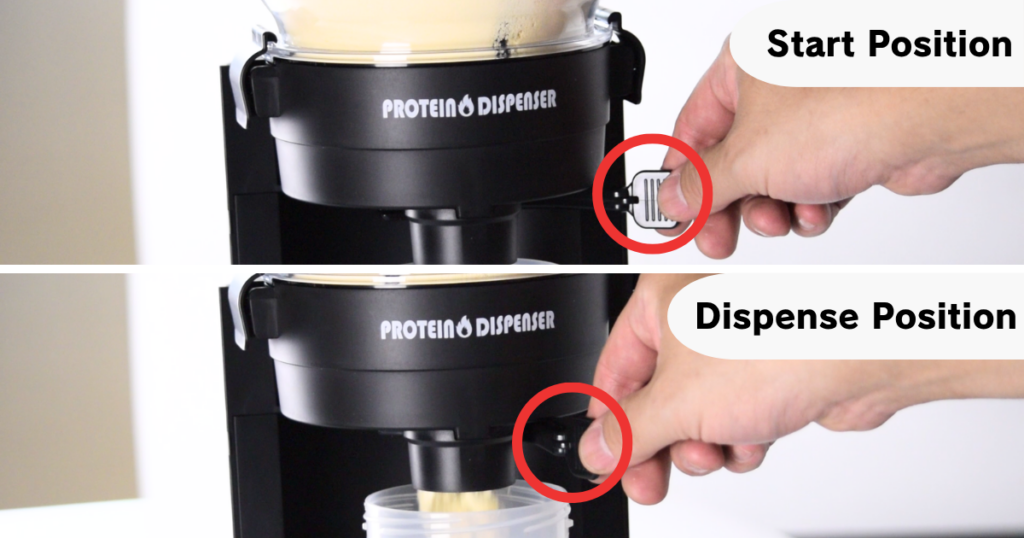
From there, using it every day is simple. Take the cap off and pull the lever all the way to stop. One pull gives you roughly 10 to 15 g, and the exact amount varies with the type of protein. Pull it as many times as your dose needs. Once you’re done, cap the nozzle and that’s it.
That ease is the biggest thing a protein dispenser gives you: no scooping, no eyeballing the amount, no powder across the counter. For how the dosing mechanism itself works, I’ve covered it in 19 Prototypes to a Dosing Mechanism — The Engineering Behind the Protein Dispenser.
3 Habits for Clean Dosing
- The first 1 or 2 doses run light: right after you fill the hopper, the first one or two come out smaller. That’s by design, and it settles from the third pull on.
- Run the lever all the way to the stop: stop partway, and the dose isn’t right. Move it until it won’t go further.
- Never work the lever with the cap on: moving the lever with the cap still fitted can jam the mechanism. Take it off before you dose.
Cleaning: Hand Wash, Dry Fully, Reassemble
First use, or the hopper just ran empty? Time to wash. Hand wash with diluted mild dish soap, dry completely, then put it back together. You’re running something you drink every day through it, so the parts that touch it get washed often. Don’t skip the dry.
Avoid these, they damage the product or cause it to fail:
- Dishwashers and dish dryers
- Abrasive sponges, steel wool, and scouring powders
- Boiling water, alcohol disinfectant, and bleach
Leave the spring on the connecting shaft where it is and wash it attached. Don’t rinse the stand under water; wipe it with a dry, soft cloth instead.
A separate article covers the full teardown with photos: which parts to wash, which to leave alone, and how to get everything properly dry. On storing the powder itself, see What Actually Matters in Protein Storage Wasn’t “Sealing It Tight”.
When Something Goes Wrong: Parts and Support
Something broke or went missing? You can buy it on its own. We hold replacement parts for 6 years after a product is discontinued, so you can keep using the dispenser for years without worrying.
If it isn’t working right, or you need a part sent out, get in touch through our contact page.
Using It Safely
Before you start, a few things to keep in mind for safe use of the dispenser:
- Put it on a level, stable surface, not on the edge of a table or a shelf
- When you move it, carry it by the stand, not by the hopper or the measuring unit
- Keep it away from water, from hot and humid spots, and from heat sources like a stove
- Fill it with freshly opened protein only, and put nothing but protein in it
- Don’t use it where children can reach it
The ALENNE Protein Dispenser
The ALENNE Protein Dispenser is Miaomada’s flagship product: pour straight from the bag or tub into the hopper, slide the lever to measure a set dose, and keep it on the counter as part of your daily routine.
The patented dosing mechanism gives you a set dose every time you pull the lever. Once you’ve been through assembly, dosing, and cleaning a couple of times, none of it takes any thought. It just becomes part of your day.
![What Is a Protein Dispenser? How It Works and Why It Matters [Complete Guide]](https://en.miaomada.co.jp/wp-content/uploads/2026/05/What-Is-a-Protein-Dispenser-768x403.png)